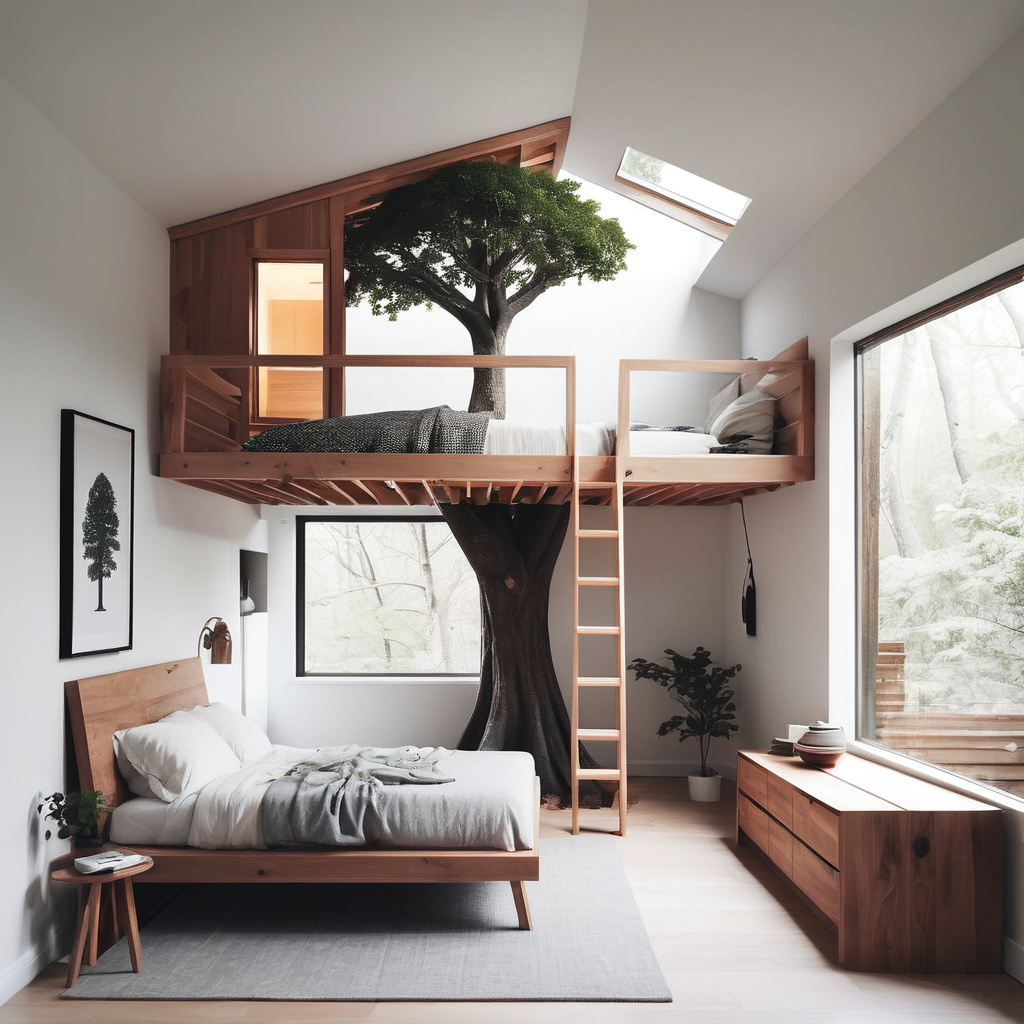
Every child dreams of having a treehouse to escape to, a place where imagination runs wild and adventures abound. While not everyone has a backyard with a suitable tree, you can bring that dream indoors by building a tree house right in your child’s room. This DIY project can create a magical space for play and creativity. Here’s how to do it:
**1. Choose the Right Spot**
Select a corner of the room that will accommodate the tree house structure without obstructing the flow of the room. Ideally, choose a corner with enough space for both the tree house and some play area beneath it.
**2. Design the Tree House**
Decide on the design and size of the tree house. It can be as simple or elaborate as you like, depending on your child’s preferences and the space available. You can create a basic structure with walls and a roof, or go all out with multiple levels, windows, and even a small balcony.
**3. Gather Materials**
You’ll need basic construction materials such as wood, screws, nails, and paint, as well as any additional decorative items you want to include. Consider using reclaimed wood for a rustic look, or go for brightly colored paint to make the tree house stand out.
**4. Build the Frame**
Start by building the frame of the tree house. Use sturdy wood beams to create the walls and support structure. Make sure everything is securely fastened to the walls and floor to ensure stability.
**5. Add Flooring and Walls**
Once the frame is in place, add the flooring and walls. You can use plywood or boards for the flooring and walls, and decorate them with paint or wallpaper to create a cozy atmosphere.
**6. Install Windows and Doors**
If you want to add windows and doors to the tree house, now is the time to do it. You can use pre-made windows and doors, or get creative and make your own using wood and plexiglass.
**7. Decorate**
Now comes the fun part – decorating the tree house! Add furniture, cushions, and blankets to make it comfortable and inviting. Hang up fairy lights or lanterns for a magical touch, and don’t forget to include some of your child’s favorite toys and books.
**8. Safety First**
Ensure that the tree house is safe for your child to play in. Check that all screws and nails are securely fastened, and that there are no sharp edges or loose parts that could cause injury. If the tree house is elevated, install a sturdy railing to prevent falls.
**9. Enjoy!**
Once the tree house is complete and safety-checked, it’s time for your child to enjoy their new space. Encourage imaginative play and creativity, and let them make the tree house their own with their own decorations and personal touches.
Building a tree house in your child’s room is a rewarding DIY project that can provide years of enjoyment. It’s a magical space where they can let their imagination soar and create memories that will last a lifetime. So roll up your sleeves, gather your materials, and get ready to build a tree house that will be the envy of the neighborhood – right in your child’s bedroom.