In a world where accessories can easily become a tangled mess, having an organizer for your slide of accessories can be a game-changer. Whether it’s jewelry, watches, or small trinkets, keeping them neatly arranged not only saves time but also adds a touch of organization to your daily routine. Instead of spending a fortune on store-bought organizers, why not try making one yourself? With a few simple materials and a bit of creativity, you can create a customized accessory organizer that perfectly fits your needs.
**Materials Needed:**
1. **Drawer Slides:** Choose drawer slides that match the dimensions of your drawer and provide smooth gliding action.
2. **Wood or Acrylic Sheets:** Opt for sturdy materials that can withstand the weight of your accessories.
3. **Saw (if cutting sheets to size):** To trim the sheets to fit your drawer dimensions.
4. **Measuring Tape:** For accurate measurements.
5. **Sandpaper:** To smooth out rough edges.
6. **Adhesive:** Choose a strong adhesive suitable for attaching the sheets to the drawer slides.
7. **Decorative Paper or Fabric (optional):** To add a personalized touch to your organizer.
**Step 1: Measure Your Drawer**
Begin by measuring the dimensions of your drawer. Take note of the width, depth, and height to ensure your organizer will fit perfectly.
**Step 2: Cut the Sheets**
Using a saw, cut the wood or acrylic sheets to fit the dimensions of your drawer. You’ll need one sheet for the base and additional sheets to create compartments for different types of accessories.
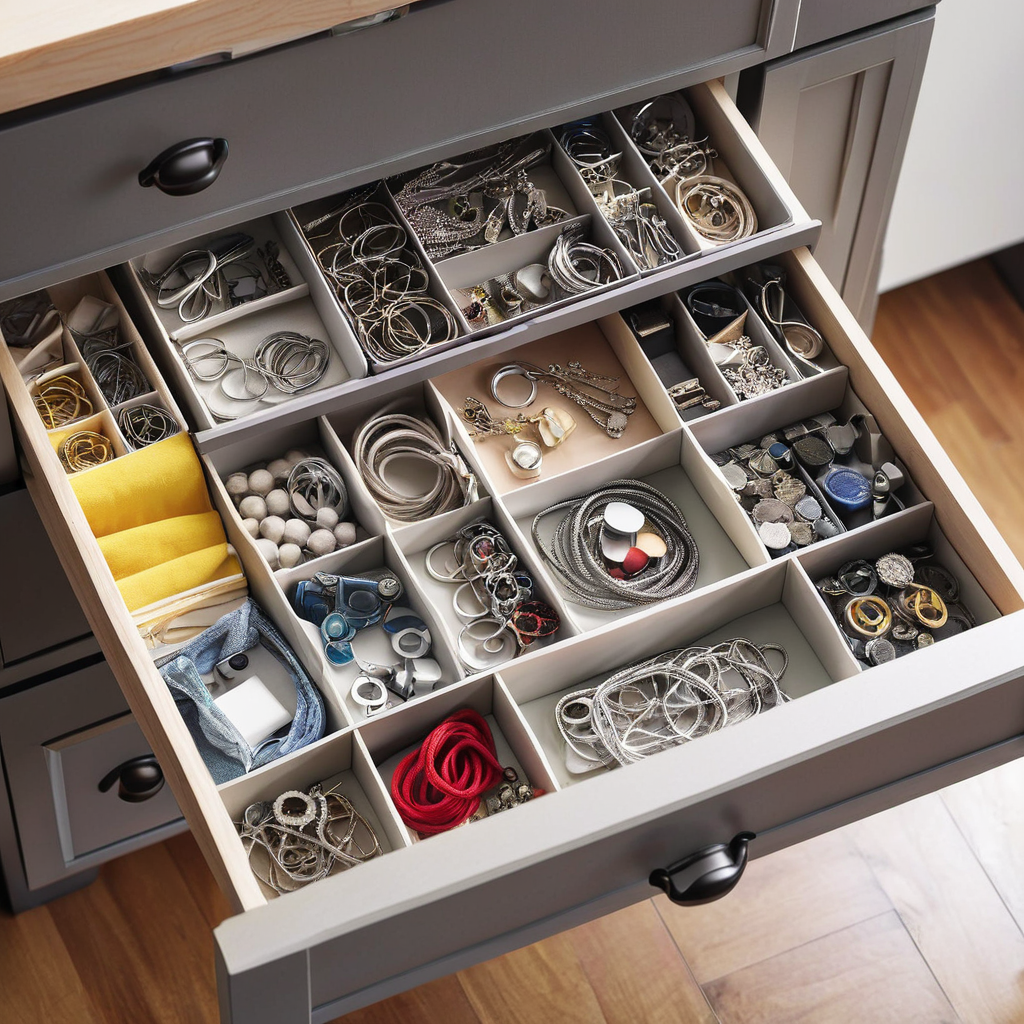
**Step 3: Create Compartments**
Arrange the sheets in the drawer to create compartments for your accessories. Consider the types of accessories you have and how you want to organize them. You can create sections for earrings, necklaces, watches, rings, and more.
**Step 4: Attach the Sheets to Drawer Slides**
Using adhesive, attach the sheets to the drawer slides. Make sure they are securely in place and allow for smooth sliding action when opening and closing the drawer.
**Step 5: Add Personal Touches (optional)**
If desired, cover the sheets with decorative paper or fabric to add a personalized touch to your organizer. This step is purely optional but can add a pop of color or pattern to your drawer.
**Step 6: Arrange Your Accessories**
Once the organizer is in place, arrange your accessories neatly within the compartments. Take the time to sort and organize them in a way that makes sense to you, making it easy to find what you need when you need it.
**Step 7: Enjoy Your Tidy Drawer**
Admire your handiwork and enjoy the satisfaction of having a neatly organized drawer of accessories. With everything in its place, getting ready in the morning or accessorizing for a special occasion will be a breeze.
Creating an organizer for the slide of accessories is not only practical but also a fun DIY project that allows you to unleash your creativity. With just a few materials and some basic woodworking skills, you can transform a cluttered drawer into a well-organized haven for your favorite accessories. So why wait? Get started on your DIY accessory organizer today and say goodbye to tangled necklaces and misplaced earrings for good!